This week, we’re going to build our first project using Rollup, which is a build tool for bundling JavaScript (and stylesheets, but we’ll get to that next week).
By the end of this tutorial, we’ll have Rollup configured to:
- combine our scripts,
- remove unused code,
- transpile it to work with older browsers,
- support the use of Node modules in the browser,
- work with environment variables, and
- compress and minify our code for the smallest possible file size.
Prerequisites
- This will make more sense if you know at least a little bit of JavaScript.
- Initial familiarity with ES2015 modules doesn’t hurt, either.
- You’ll need
npminstalled on your machine. (Don’t have it? Install Node.js here.)
Series Navigation
- Part I: How to Use Rollup to Process and Bundle JavaScript Files <— you are here
- Part II: How to Use Rollup to Process and Bundle Stylesheets
What Is Rollup?
In their own words:
Rollup is a next-generation JavaScript module bundler. Author your app or library using ES2015 modules, then efficiently bundle them up into a single file for use in browsers and Node.js.
It’s similar to Browserify and webpack.
You could also call Rollup a build tool, which would put it in the company of things like Grunt and Gulp. However, it’s important to note that while you can use Grunt and Gulp to handle tasks like creating JavaScript bundles, those tools would use something like Rollup, Browserify, or webpack under the hood.
Why should you care about Rollup?
What makes Rollup exciting, though, is its ability to keep files small. This gets pretty nerdy, so the tl;dr version is this: compared to the other tools for creating JavaScript bundles, Rollup will almost always create a smaller, faster bundle.
This happens because Rollup is based on ES2015 modules, which are more efficient than CommonJS modules, which are what webpack and Browserify use. It’s also much easier for Rollup to remove unused code from modules using something called tree-shaking, which basically just means only the code we actually need is included in the final bundle.
Tree-shaking becomes really important when we’re including third-party tools or frameworks that have dozens of functions and methods available. If we’re only using one or two — think lodash or jQuery — there’s a lot of wasted overhead in loading the rest of the library.
Browserify and webpack will end up including a lot of unused code right now. But Rollup doesn’t — it’ll only bring in what we’re actually using.
And that’s huge.
Part I: How to Use Rollup to Process and Bundle JavaScript Files
To show how effective Rollup is, let’s walk through the process of building an extremely simple project that uses Rollup to bundle JavaScript.
Step 0: Create a project with JavaScript and CSS to be compiled.
In order to get started, we need to have some code to work with. For this tutorial, we’ll be working with a small app, available on GitHub.
The folder structure looks like this:
learn-rollup/
├── build/
│ └── index.html
├── src/
│ ├── scripts/
│ │ ├── modules/
│ │ │ ├── mod1.js
│ │ │ └── mod2.js
│ │ └── main.js
│ └── styles/
│ └── main.css
└── package.json
You can install the app we’ll be working with during this tutorial by running the following command into your terminal.
# Move to the folder where you keep your dev projects.
cd /path/to/your/projects

# Clone the starter branch of the app from GitHub.
git clone -b step-0 --single-branch https://github.com/jlengstorf/learn-rollup.git

# The files are downloaded to /path/to/your/projects/learn-rollup/Step 1: Install Rollup and create a configuration file.
To get started, install Rollup with the following command:
npm install --save-dev rollupNext, create a new file called rollup.config.js in the learn-rollup folder. Inside, add the following.
export default {
  entry: 'src/scripts/main.js',
  dest: 'build/js/main.min.js',
  format: 'iife',
  sourceMap: 'inline',
};
Let’s talk about what each of these configuration options actually does:
-
entry— this is the file we want Rollup to process. In most apps, this would be the main JavaScript file, which initializes everything and actually starts the show. -
dest— this is the location where the processed scripts should be saved. -
format— Rollup supports several output formats. Since we’re running in the browser, we want to use an immediately-invoked function expression (IIFE).(This is a fairly complex concept to understand, so don’t stress if it doesn’t make total sense. In a nutshell, we want our code to be inside its own scope, which prevents conflicts with other scripts. An IIFE is a closure that contains our code in its own scope.)
-
sourceMap— it’s extremely helpful for debugging to provide a sourcemap. This option adds a sourcemap inside the generated file, which keeps things simple.
Test the Rollup configuration.
Once we’ve created the config file, we can test that everything is working by running the following command in our terminal:
./node_modules/.bin/rollup -cThis will create a new folder called build in your project, with a js subfolder that contains our generated main.min.js file.
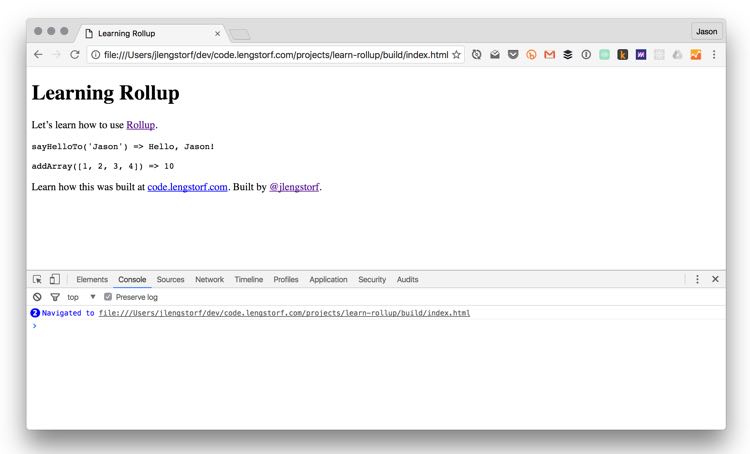
We can see that the bundle was created properly by opening build/index.html in our browser:
Look at the Bundled Output
What makes Rollup powerful is the fact that it uses “tree-shaking”, which leaves out unused code in the modules we reference. For example, in src/scripts/modules/mod1.js, there’s a function called sayGoodbyeTo() that isn’t used in our app — and since it’s never used, Rollup doesn’t include it in our bundle:
(function () {
  'use strict';

  /**
   * Says hello.
   * @param  {String} name a name
   * @return {String}      a greeting for `name`
   */
  function sayHelloTo(name) {
    const toSay = `Hello, ${name}!`;

    return toSay;
  }

  /**
   * Adds all the values in an array.
   * @param  {Array} arr an array of numbers
   * @return {Number}    the sum of all the array values
   */
  const addArray = (arr) => {
    const result = arr.reduce((a, b) => a + b, 0);

    return result;
  };

  // Import a couple modules for testing.
  // Run some functions from our imported modules.
  const result1 = sayHelloTo('Jason');
  const result2 = addArray([1, 2, 3, 4]);

  // Print the results on the page.
  const printTarget = document.getElementsByClassName('debug__output')[0];

  printTarget.innerText = `sayHelloTo('Jason') => ${result1}\n\n`;
  printTarget.innerText += `addArray([1, 2, 3, 4]) => ${result2}`;
})();
//# sourceMappingURL=data:application/json;charset=utf-8;base64,...
In other build tools that’s not always the case, and bundles can get really large if we include everything inside a bigger library like lodash just to reference one or two functions.
For example, using webpack, the sayGoodbyeTo() function is included, and the resulting bundle is more than double the size of what Rollup generates.
Step 2: Set up Babel so we can use new JavaScript features now.
At this point, we’ve got a code bundle that will work in modern browsers, but it’ll break if the browser is even a couple versions old in some cases — that’s not ideal.
Fortunately, Babel has us covered. This project transpiles new features of JavaScript (ES6/ES2015 and so on) into ES5, which will run on virtually any browser that’s still used today.
If you’ve never used Babel, your life as a developer is about to change forever. Having access to the new features of JavaScript makes the language simpler, cleaner, and more pleasant in general.
So let’s make that part of our Rollup process so we don’t have to think about it.
Install the necessary modules.
First, we need to install the Babel Rollup plugin and the appropriate Babel preset.
# Install Rollup’s Babel plugin.
npm install --save-dev rollup-plugin-babel

# Install the Babel preset for transpiling ES2015.
npm install --save-dev babel-preset-es2015

# Install Babel’s external helpers for module support.
npm install --save-dev babel-plugin-external-helpersCreate a .babelrc.
Next, create a new file called .babelrc in your project’s root directory (learn-rollup/). Inside, add the following JSON:
{
  "presets": [
    [
      "es2015",
      {
        "modules": false
      }
    ]
  ],
  "plugins": ["external-helpers"]
}
This tells Babel which preset it should use during transpiling.
Update rollup.config.js.
To make this actually do stuff, we need to update rollup.config.js.
Inside, we import the Babel plugin, then add it to a new configuration property called plugins, which will hold an array of plugins.
// Rollup plugins
import babel from 'rollup-plugin-babel';

export default {
  entry: 'src/scripts/main.js',
  dest: 'build/js/main.min.js',
  format: 'iife',
  sourceMap: 'inline',
  plugins: [
    babel({
      exclude: 'node_modules/**',
    }),
  ],
};
In order to avoid transpiling third-party scripts, we set an exclude config property to ignore the node_modules directory.
Check the bundle output.
With everything installed and configured, we can rebuild the bundle:
./node_modules/.bin/rollup -cWhen we look at the output, it looks mostly the same. But there are a few key differences: for example, look at the addArray() function:
var addArray = function addArray(arr) {
  var result = arr.reduce(function (a, b) {
    return a + b;
  }, 0);

  return result;
};
See how Babel converted the fat-arrow function (arr.reduce((a, b) => a + b, 0))to a regular function?
That’s transpiling in action: the result is the same, but the code is now supported back to IE9.
Step 3: Add ESLint to check for common JavaScript errors.
It’s always a good idea to use a linter for your code, because it enforces consistent coding practices and helps catch tricky bugs like missing brackets or parentheses.
For this project, we’ll be using ESLint.
Install the Modules.
In order to use ESLint, we’ll want to install the ESLint Rollup plugin:
npm install --save-dev rollup-plugin-eslintGenerate a .eslintrc.json.
To make sure we only get errors we want, we need to configure ESLint first. Fortunately, we can automatically generate most of this configuration by running the following command:
$ ./node_modules/.bin/eslint --init
? How would you like to configure ESLint? Answer questions about your style
? Are you using ECMAScript 6 features? Yes
? Are you using ES6 modules? Yes
? Where will your code run? Browser
? Do you use CommonJS? No
? Do you use JSX? No
? What style of indentation do you use? Spaces
? What quotes do you use for strings? Single
? What line endings do you use? Unix
? Do you require semicolons? Yes
? What format do you want your config file to be in? JSON
Successfully created .eslintrc.json file in /Users/jlengstorf/dev/code.lengstorf.com/projects/learn-rollup
If you answer the questions as shown above, you’ll get the following output in .eslintrc.json:
{
  "env": {
    "browser": true,
    "es6": true
  },
  "extends": "eslint:recommended",
  "parserOptions": {
    "sourceType": "module"
  },
  "rules": {
    "indent": ["error", 4],
    "linebreak-style": ["error", "unix"],
    "quotes": ["error", "single"],
    "semi": ["error", "always"]
  }
}
Tweak .eslintrc.json.
However, we need to make a couple adjustments to avoid errors for our project:
- We’re using 2 spaces instead of 4.
- We will use a global variable called
ENVlater, so we need to whitelist that.
Make the following adjustments — the globals property and the adjustment to the indent property — to your .eslintrc.json:
{
  "env": {
    "browser": true,
    "es6": true
  },
  "globals": {
    "ENV": true
  },
  "extends": "eslint:recommended",
  "parserOptions": {
    "sourceType": "module"
  },
  "rules": {
    "indent": ["error", 2],
    "linebreak-style": ["error", "unix"],
    "quotes": ["error", "single"],
    "semi": ["error", "always"]
  }
}
Update rollup.config.js.
Next, import the ESLint plugin and add it to the Rollup configuration:
// Rollup plugins
import babel from 'rollup-plugin-babel';
import eslint from 'rollup-plugin-eslint';

export default {
  entry: 'src/scripts/main.js',
  dest: 'build/js/main.min.js',
  format: 'iife',
  sourceMap: 'inline',
  plugins: [
    eslint({
      exclude: ['src/styles/**'],
    }),
    babel({
      exclude: 'node_modules/**',
    }),
  ],
};
Check the console output.
At first, when we run ./node_modules/.bin/rollup -c, nothing seems to be happening. That’s because as it stands, the app’s code passes the linter without issues.
But if we introduce an issue — say removing a semicolon — we’ll see how ESLint helps:
$ ./node_modules/.bin/rollup -c

/Users/jlengstorf/dev/code.lengstorf.com/projects/learn-rollup/src/scripts/main.js
12:64 error Missing semicolon semi

✖ 1 problem (1 error, 0 warnings)
Something that has the potential to introduce a mystery bug is now pointed out instantly, including the file, line, and column where the issue is happening.
While this won’t eliminate all of our problems with debugging, it goes a long way toward squashing bugs that are due to obvious typos and oversights.
(As someone who has previously spent — ahem — numerous hours chasing bugs that ended up being something as silly as a misspelled variable name, it’s hard to overstate the efficiency boost that working with a linter provides.)
Step 4: Add plugins to handle non-ES modules.
This is important if any of your dependencies use Node-style modules. Without it, you’ll get errors about require.
Add a Node module as a dependency.
It would be easy to bang through this sample project without referencing a third-party module, but that’s not going to cut it in real projects. So, in the interest of making our Rollup setup actually useful, let’s make sure we can also reference third-party modules in our code.
For simplicity, we’ll add a simple logger to our code using the debug package. Start by installing it:
npm install --save debugThen, inside src/scripts/main.js, let’s add some simple logging:
// Import a couple modules for testing.
import { sayHelloTo } from './modules/mod1';
import addArray from './modules/mod2';

// Import a logger for easier debugging.
import debug from 'debug';
const log = debug('app:log');

// Enable the logger.
debug.enable('*');
log('Logging is enabled!');

// Run some functions from our imported modules.
const result1 = sayHelloTo('Jason');
const result2 = addArray([1, 2, 3, 4]);

// Print the results on the page.
const printTarget = document.getElementsByClassName('debug__output')[0];

printTarget.innerText = `sayHelloTo('Jason') => ${result1}\n\n`;
printTarget.innerText += `addArray([1, 2, 3, 4]) => ${result2}`;
So far so good, but when we run rollup we get a warning:
$ ./node_modules/.bin/rollup -c
Treating 'debug' as external dependency
No name was provided for external module 'debug' in options.globals – guessing 'debug'
And if we check our index.html again, we can see that a ReferenceError was thrown for debug:
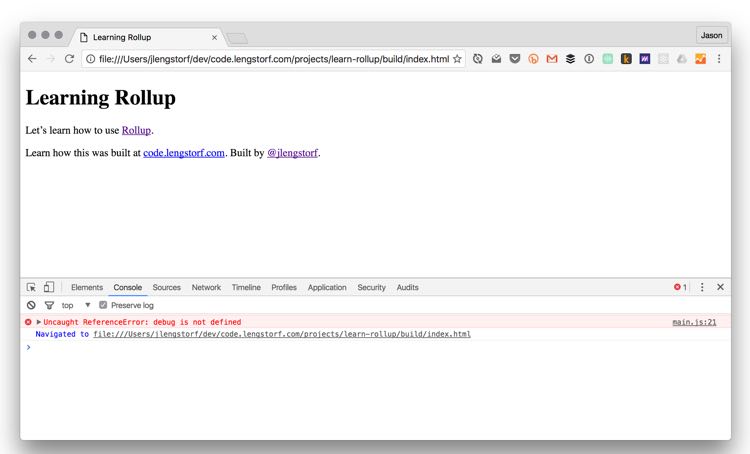
Well, shit. That didn’t work at all.
This happens because Node modules use CommonJS, which isn’t compatible with Rollup out of the box. To solve this, we need to add a couple plugins for handling Node dependencies and CommonJS modules.
Install the modules.
To work around this problem, we’re going to add two plugins to Rollup:
rollup-plugin-node-resolve, which allows us to load third-party modules innode_modules.rollup-plugin-commonjs, which coverts CommonJS modules to ES6, which stops them from breaking Rollup.
Install both plugins with the following command:
npm install --save-dev rollup-plugin-node-resolve rollup-plugin-commonjsUpdate rollup.config.js.
Next, import and add the plugins to the Rollup config:
// Rollup plugins
import babel from 'rollup-plugin-babel';
import eslint from 'rollup-plugin-eslint';
import resolve from 'rollup-plugin-node-resolve';
import commonjs from 'rollup-plugin-commonjs';

export default {
  entry: 'src/scripts/main.js',
  dest: 'build/js/main.min.js',
  format: 'iife',
  sourceMap: 'inline',
  plugins: [
    resolve({
      jsnext: true,
      main: true,
      browser: true,
    }),
    commonjs(),
    eslint({
      exclude: ['src/styles/**'],
    }),
    babel({
      exclude: 'node_modules/**',
    }),
  ],
};Check the console output.
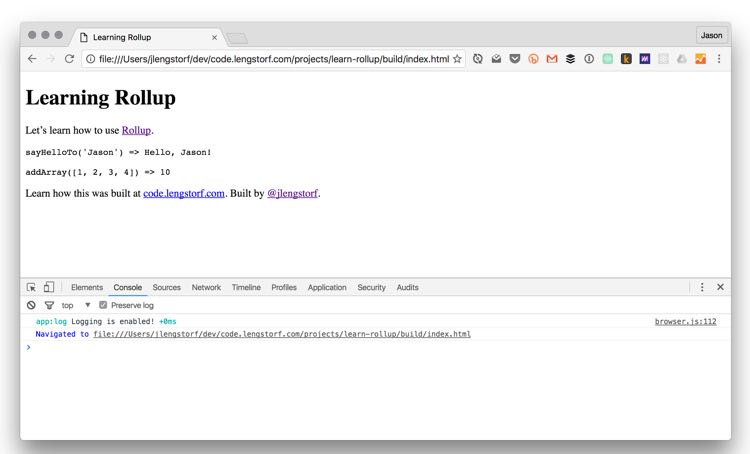
Rebuild the bundle with ./node_modules/.bin/rollup -c, then check the browser again to see the output:
Step 5: Add a plugin to replace environment variables.
Environment variables add a lot of power to our development flow, and give us the ability to do things such as turning logging off and on, injecting dev-only scripts, and more.
So let’s make sure Rollup will enable us to use them.
Add an ENV-based conditional in main.js.
Let’s make use of an environment variable and only enable our logging script if we’re not in production mode. In src/scripts/main.js, let’s change the way our log() is initialized:
// Import a logger for easier debugging.
import debug from 'debug';
const log = debug('app:log');

// The logger should only be disabled if we’re not in production.
if (ENV !== 'production') {
  // Enable the logger.
  debug.enable('*');
  log('Logging is enabled!');
} else {
  debug.disable();
}
However, after we rebuild our bundle (./node_modules/.bin/rollup -c) and check the browser, we can see that this gives us a ReferenceError for ENV.
That shouldn’t be surprising, though, because we haven’t defined it anywhere. But if we try something like ENV=production ./node_modules/.bin/rollup -c, it still doesn’t work. This is because setting an environment variable that way only makes it available to Rollup, not to the bundle created by Rollup.
We’ll need to use a plugin to pass our environment variables into the bundle.
Install the modules.
Start by installing rollup-plugin-replace, which is essentially just a find-and-replace utility. It can do a lot of things, but for our purposes we’ll have it simply find an occurrence of an environment variable and replace it with the actual value (e.g. all occurrences of ENV would be replaced with "production" in the bundle).
npm install --save-dev rollup-plugin-replaceUpdate rollup.config.js.
Inside rollup.config.js, let’s import the plugin and add it to our list of plugins.
The configuration is pretty straightforward: we can just add a list of key: value pairs, where the key is the string to replace, and the value is what it should be replaced with.
// Rollup plugins
import babel from 'rollup-plugin-babel';
import eslint from 'rollup-plugin-eslint';
import resolve from 'rollup-plugin-node-resolve';
import commonjs from 'rollup-plugin-commonjs';
import replace from 'rollup-plugin-replace';

export default {
  entry: 'src/scripts/main.js',
  dest: 'build/js/main.min.js',
  format: 'iife',
  sourceMap: 'inline',
  plugins: [
    resolve({
      jsnext: true,
      main: true,
      browser: true,
    }),
    commonjs(),
    eslint({
      exclude: ['src/styles/**'],
    }),
    babel({
      exclude: 'node_modules/**',
    }),
    replace({
      exclude: 'node_modules/**',
      ENV: JSON.stringify(process.env.NODE_ENV || 'development'),
    }),
  ],
};
In our configuration, we’re going to find every occurence of ENV and replace it with either the value of process.env.NODE_ENV — the conventional way of setting the environment in Node apps — or “development”. We use JSON.stringify() to make sure the value is wrapped in double quotes, since ENV is not.
To make sure we don’t cause issues with third-party code, we also set the exclude property to ignore our node_modules directory and all the packages it contains. (Thanks to @wesleycoder for the heads-up on this.)
Check the results.
To start, rebuild the bundle and check the browser. The console log should show up, just like before. That’s good — that means our default value was applied.
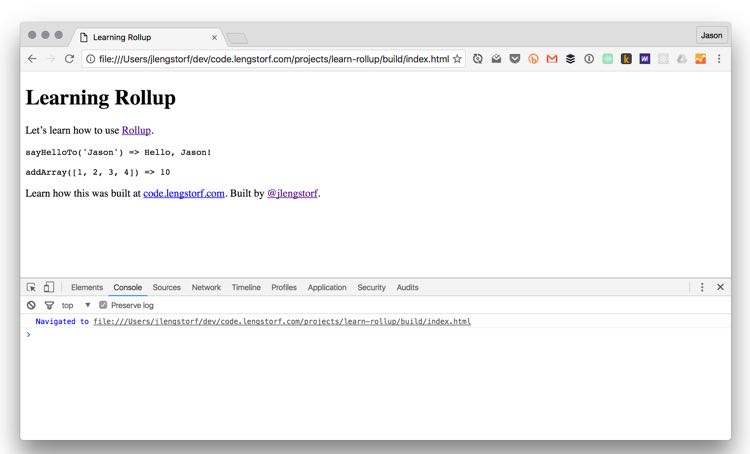
To see where the power comes in, let’s run the command in production mode:
NODE_ENV=production ./node_modules/.bin/rollup -cWhen we reload the browser, there’s nothing logged to the console:
Step 6: Add UglifyJS to compress and minify our generated script.
The last JavaScript step we’ll go through in this tutorial is adding UglifyJS to minify and compress the bundle. This can hugely reduce the size of a bundle by removing comments, shortening variable names, and otherwise mangling the hell out of the code — which makes it more or less unreadable for humans, but much more efficient to deliver over a network.
Install the plugin.
We’ll be using UglifyJS to compress the bundle, by way of rollup-plugin-uglify.
Install it with the following:
npm install --save-dev rollup-plugin-uglifyUpdate rollup.config.js.
Next, let’s add Uglify to our Rollup config. However, for legibility during development, let’s make uglification a production-only feature:
// Rollup plugins
import babel from 'rollup-plugin-babel';
import eslint from 'rollup-plugin-eslint';
import resolve from 'rollup-plugin-node-resolve';
import commonjs from 'rollup-plugin-commonjs';
import replace from 'rollup-plugin-replace';
import uglify from 'rollup-plugin-uglify';

export default {
  entry: 'src/scripts/main.js',
  dest: 'build/js/main.min.js',
  format: 'iife',
  sourceMap: 'inline',
  plugins: [
    resolve({
      jsnext: true,
      main: true,
      browser: true,
    }),
    commonjs(),
    eslint({
      exclude: ['src/styles/**'],
    }),
    babel({
      exclude: 'node_modules/**',
    }),
    replace({
      ENV: JSON.stringify(process.env.NODE_ENV || 'development'),
    }),
    process.env.NODE_ENV === 'production' && uglify(),
  ],
};
We’re using something called short-circuit evaluation, which is a common (though debatably evil) shortcut for conditionally setting a value. (For example, it’s pretty common to see this used to assign default values, like var value = maybeThisExists || 'default'.)
In our case, we’re only loading uglify() if NODE_ENV is set to “production”.
Check the minified bundle.
With the configuration saved, let’s run Rollup with NODE_ENV in production:
NODE_ENV=production ./node_modules/.bin/rollup -cThe output isn’t pretty, but it’s much smaller. Here’s a screenshot of what build/js/main.min.js looks like now:

Before, our bundle was ~42KB. After running it through UglifyJS, it’s down to ~29KB — we just saved over 30% on file size with no additional effort.
Coming Up Next
In the next installment of this series, we’ll look at handling stylesheets through Rollup using PostCSS, as well as adding live reloading so we can see our changes near-instantaneously as we make them.
Further Reading
- The cost of small modules — this is the article that got me interested in Rollup, because it shows some significant advantages of Rollup over webpack and Browserify.
- Rollup’s getting started guide
- Rollup’s CLI docs
- A list of Rollup plugins