Elevator Pitch:
Set up a new WordPress site using the Roots stack.
Prerequisites
- A private server (we’ll walk through how to set this up for $5/month) — Trellis cannot run on a shared host, so this isn’t optional.
- Homebrew (v1.0.7 used in this tutorial)
# Install Homebrew.
ruby -e "$(curl -fsSL https://raw.githubusercontent.com/Homebrew/install/master/install)"- Git (v2.10.1 used in this tutorial)
# Install Git with Homebrew
brew install git- Ansible (v2.1.2.0 used in this tutorial)
# Install Ansible with Homebrew
brew install ansible- Composer (v1.2.1 used in this tutorial)
# Install Composer with Homebrew
brew install composer- Virtualbox (v5.0.18r106667 used in this tutorial)
- Vagrant (v1.8.5 used in this tutorial)
Part I: Install Trellis
To get things rolling, we need to grab a copy of Trellis from GitHub.
Create a new directory for the site.
# Move into the directory where where you keep dev projects.
cd ~/dev/code.lengstorf.com/projects/

# Create a new directory for this project
mkdir learn-trellis

# Move into the new directory.
cd learn-trellis/
Get a copy of Trellis to manage environments and deployment.
Since we want to track our copy of Trellis as its own project, we don’t actually want the Trellis repo information. By adding --depth=1 to the clone command, we’re able to get only the most recently committed version (avoiding a lot of wasted bandwidth downloading the commit history). Then, we delete the .git directory so we can have our own Git project.
# Clone Trellis, but without all the Git history.
git clone --depth=1 git@github.com:roots/trellis.git

# Delete the `.git` file so we can have our own Git repo.
rm -rf trellis/.git
Install Ansible dependencies.
One of the most powerful parts of Ansible is the ability to use community-supplied scripts — called “roles” in the Ansible world — rather than having to write them from scratch or copy-paste them from various forums and tutorials.
This collection of community roles is called Galaxy, and it’s home to thousands of roles. Trellis uses several of these to configure a WordPress server, so we need to get those installed.
# Move into the Trellis directory
cd trellis/

# Install the Ansible dependencies for Trellis.
ansible-galaxy install -r requirements.yml
Part II: Install Bedrock
We’re not going to do talk much about Bedrock, but the short version is this: Bedrock makes WordPress development on a team much less frustrating by:
- Using Composer to manage all dependencies — including WordPress plugins and the core itself — to make it easier to work with version control and develop across teams
- Easier environment-specific configuration
- Better security through directory structure improvements and the use of better password encryption
Get a copy of Bedrock to make WordPress’s file structure sane.
Just like we did with Trellis, we want to get a copy of Bedrock without the Git repository. So we do a shallow clone and then remove the .git folder.
# Move back into the project root.
cd ..

# Clone Bedrock to the `site` directory.
git clone --depth=1 git@github.com:roots/bedrock.git site

# Remove the `.git` file so we can have our own Git repo.
rm -rf site/.gitPart III: Configure a Development Site
With all the proper dependencies installed, we can start configuring our development site, which will run on our computer.
Add site details to wordpress_sites.yml.
Open trellis/group_vars/development/wordpress_sites.yml in your editor:
# Documentation: https://roots.io/trellis/docs/local-development-setup/
# `wordpress_sites` options: https://roots.io/trellis/docs/wordpress-sites
# Define accompanying passwords/secrets in group_vars/development/vault.yml

wordpress_sites:
  example.com:
    site_hosts:
      - canonical: example.dev
        redirects:
          - www.example.dev
    local_path: ../site # path targeting local Bedrock site directory (relative to Ansible root)
    admin_email: admin@example.dev
    multisite:
      enabled: false
    ssl:
      enabled: false
      provider: self-signed
    cache:
      enabled: false
If you’re not familiar with YAML, it’s a common way of describing data. It’s indentation-based, so the default file creates a wordpress_sites object, and that contains an example.com object, which holds config properties (e.g. site_hosts).
Each site is identified by a key — in the example, the key is example.com — which allows us to link together our development, staging, and production environments without a bunch of duplicated configuration.
As a general rule, the production domain name is a good key to use.
With that in mind, let’s set up our site by making the following changes to wordpress_sites.yml:
  wordpress_sites:
+   roots.code.lengstorf.com:
      site_hosts:
+       - canonical: roots.dev
-         redirects:
-           - www.example.dev
      local_path: ../site # path targeting local Bedrock site directory (relative to Ansible root)
+     admin_email: jason@lengstorf.com
      multisite:
        enabled: false
      ssl:
        enabled: false
        provider: self-signed
      cache:
        enabled: false
I’ll be deploying the site to a production domain of roots.code.lengstorf.com, so that’s my site key. For local development, we’ll use roots.dev as the URL, and we don’t need the redirects here, so we can remove them.
Finally, we updated the admin_email.
Save the changes and we’re ready to move on.
Add credentials to vault.yml.
Next, we’ll open trellis/group_vars/development/vault.yml:
# Documentation: https://roots.io/trellis/docs/vault/
vault_mysql_root_password: devpw

# Variables to accompany `group_vars/development/wordpress_sites.yml`
# Note: the site name (`example.com`) must match up with the site name in the above file.
vault_wordpress_sites:
  example.com:
    admin_password: admin
    env:
      db_password: example_dbpassword
Here we can see that the site key is example.com, so we’ll need to update that.
We also need to update admin_password, which is the password we’ll use to log into WordPress’s dashboard.
And finally, we’ll add strong passwords for the MySQL root user and the site’s DB access.
Make the following changes in vault.yml:
  # Documentation: https://roots.io/trellis/docs/vault/
+ vault_mysql_root_password: "xy&G6o2kKH$#AFz247N."

  # Variables to accompany `group_vars/development/wordpress_sites.yml`
  # Note: the site name (`example.com`) must match up with the site name in the   above file.
  vault_wordpress_sites:
+   roots.code.lengstorf.com:
+     admin_password: "DM93zj,o29KjT/bh$8G$"
      env:
+ db_password: "qP42q2*?hjt.P+x7Bzc6"Save the changes — now we’re ready to fire up a local development box.
Part IV: Start a Local Instance of the WordPress Site Using Vagrant
Here’s where the power of Trellis starts to become apparent.
Assuming the required software is installed, only four steps are required to get to this point:
- Clone Trellis.
- Clone Bedrock.
- Update
wordpress_sites.yaml - Update
vault.yaml
When you compare that to the “normal” WordPress setup — clone WordPress, create a database, configure your local hosts file to give you a development URL, and so on — Trellis is far simpler. And we’re not even to the really good stuff yet.
Start the development site.
To start the development site, it’s one simple command:
vagrant upThe first time you run this, it’ll take a 5–10 minutes. This is because Vagrant needs to download and configure all the pieces required to get the box up and running properly. After the first time, a lot of dependencies will be cached, which makes things much quicker for subsequent calls to vagrant up.
Check the development site on your local machine.
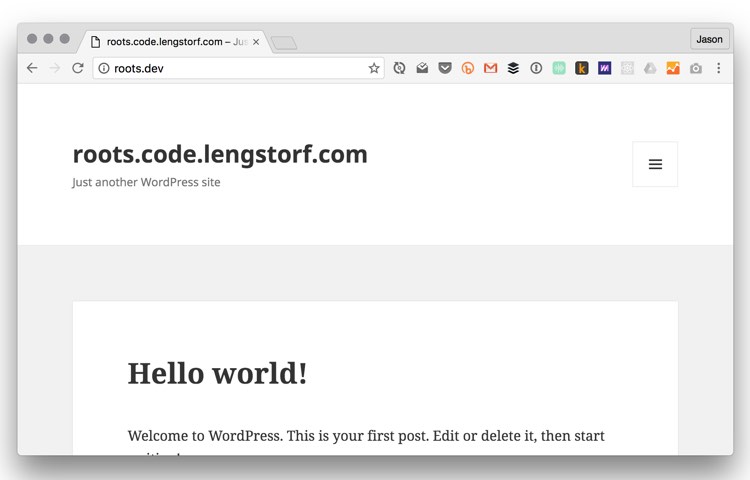
Once Vagrant is done, we can open the dev site by visiting http://roots.dev/ in our browser.
Log into the WordPress dashboard.
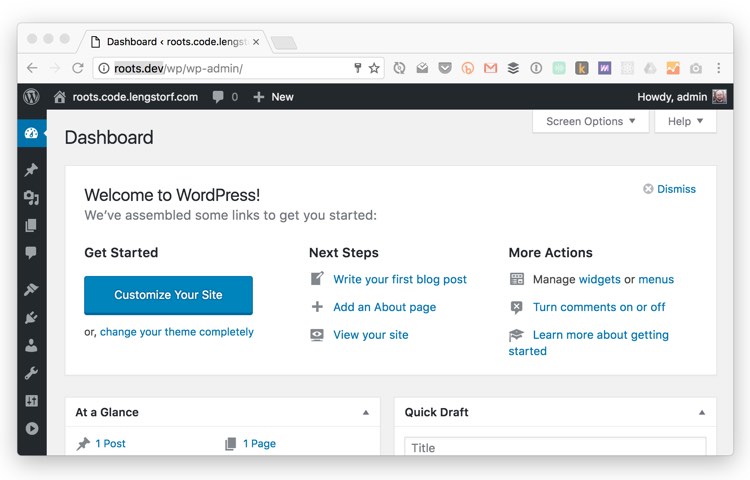
To log into the WordPress dashboard, head to http://roots.dev/wp/wp-admin/ in your browser and use the admin_password we set in vault.yml earlier.
Part V: Configure a Production Server
Wait, what? We’re already deploying to production?
Yep. That’s how easy Trellis is.
Create a Digital Ocean droplet to host the site.
It’s hard to beat $5/month for hosting a website, so Digital Ocean will be our choice of production host.
To get started, create or log into your DigitalOcean account, then create a new droplet.
Choose Ubuntu 16.04.1 x64 for the distribution, $5/mo for the size, and choose any datacenter region.
Update hosts/production.
To tell Trellis where the production server lives, we need to add its IP address to trellis/hosts/production.
# Add each host to the [production] group and to a "type" group such as [web] or [db].
# List each machine only once per [group], even if it will host multiple sites.

[production]
your_server_hostname

[web]
your_server_hostname
Make the following edits:
  # Add each host to the [production] group and to a "type" group such as [web] or [db].
  # List each machine only once per [group], even if it will host multiple sites.

  [production]
+ 162.243.171.188

  [web]
+ 162.243.171.188
Enable free SSL and caching for production.
Setting up the production site configuration is nearly identical to the development site, except we need to add a few more settings for things like security. We can get these in place by editing trellis/group_vars/production/wordpress_sites.yml:
# Documentation: https://roots.io/trellis/docs/remote-server-setup/
# `wordpress_sites` options: https://roots.io/trellis/docs/wordpress-sites
# Define accompanying passwords/secrets in group_vars/production/vault.yml

wordpress_sites:
  example.com:
    site_hosts:
      - canonical: example.com
        redirects:
          - www.example.com
    local_path: ../site # path targeting local Bedrock site directory (relative to Ansible root)
    repo: git@github.com:example/example.com.git # replace with your Git repo URL
    repo_subtree_path: site # relative path to your Bedrock/WP directory in your repo
    branch: master
    multisite:
      enabled: false
    ssl:
      enabled: false
      provider: letsencrypt
    cache:
      enabled: false
Inside, make the following edits:
  # Documentation: https://roots.io/trellis/docs/remote-server-setup/
  # `wordpress_sites` options: https://roots.io/trellis/docs/wordpress-sites
  # Define accompanying passwords/secrets in group_vars/production/vault.yml

  wordpress_sites:
+   roots.code.lengstorf.com:
      site_hosts:
+       - canonical: roots.code.lengstorf.com
-         redirects:
-           - www.example.com
      local_path: ../site # path targeting local Bedrock site directory (relative to Ansible root)
+     repo: git@github.com:jlengstorf/roots.code.lengstorf.com.git # replace with your Git repo URL
      repo_subtree_path: site # relative path to your Bedrock/WP directory in your repo
      branch: master
      multisite:
        enabled: false
      ssl:
+       enabled: true
        provider: letsencrypt
      cache:
+       enabled: true
In addition to setting the site’s URL, we also tell Trellis where the source code can be found with the repo setting, and enable SSL and caching for a faster, more secure site.
Add security settings to vault.yml.
Next, we need to add passwords and encryption keys for the site. We do this by editing trellis/group_vars/production/vault.yml:
# Documentation: https://roots.io/trellis/docs/vault/
vault_mysql_root_password: productionpw

# Documentation: https://roots.io/trellis/docs/security/
vault_users:
  - name: '{{ admin_user }}'
    password: example_password
    salt: 'generateme'

# Variables to accompany `group_vars/production/wordpress_sites.yml`
# Note: the site name (`example.com`) must match up with the site name in the above file.
vault_wordpress_sites:
  example.com:
    env:
      db_password: example_dbpassword
      # Generate your keys here: https://roots.io/salts.html
      auth_key: 'generateme'
      secure_auth_key: 'generateme'
      logged_in_key: 'generateme'
      nonce_key: 'generateme'
      auth_salt: 'generateme'
      secure_auth_salt: 'generateme'
      logged_in_salt: 'generateme'
      nonce_salt: 'generateme'
Make the following changes:
  # Documentation: https://roots.io/trellis/docs/vault/
+ vault_mysql_root_password: "z3Q6m3x8y?j@k&3+xuBq"

  # Documentation: https://roots.io/trellis/docs/security/
  vault_users:
    - name: "{{ admin_user }}"
+     password: "vH.827WQ2,t9?vyZyuB@"
+     salt: "jRMB764/EpB+,j(hvL98"

  # Variables to accompany `group_vars/production/wordpress_sites.yml`
  # Note: the site name (`example.com`) must match up with the site name in the above file.
  vault_wordpress_sites:
+   roots.code.lengstorf.com:
      env:
+       db_password: "#RLLE3)h9z9RDMT6d/4%"
        # Generate your keys here: https://roots.io/salts.html
+       auth_key: "&/qSrw23*@HeP2Kk#{^Ntx[!N>7#IdA=pCtI5gkpfgnn8{gDQ]2PQye]OkI.-p9f"
+       secure_auth_key: "LwX}3v}-P72LyH<o+kK&&M]^F3/#*&[um5$OiV@v:b!052Kaq%b]OQy=$@7F>=fF"
+       logged_in_key: "k+;dLHoBtR)5Y4VfyxMmm(fKp+Z<Uy]1PZvS_f#o`xGy7e=GNN1BEkd11s035t1:"
+       nonce_key: "!7#7ow=)d17Y[RlzSVA)_?GH<.e7-|SvD*&|;_5Y7)J@w]Dl,Q9_o!hUP8]G]n.k"
+       auth_salt: "G)0!0Z?MGKS?K,s$03=4e5Xu+[l:hw|X5Llr^H.e#[^Yd*m[)uOBYLh9/Zdwp{ir"
+       secure_auth_salt: "<tXa0,1PN;4}]VkkY|-[B$`AGi]KT{z5H:F/0EtFCBJ,KE/j%(5[.$pZ<1WP8y<I"
+       logged_in_salt: "lT*P7xsVeh=f}u9?b#F>4h8dY?]?>t{5cXby=jziz:1!o,gGO#z*lIw|[#y%,/SN"
+       nonce_salt: "BZqsYn4aC}?z@`HSi22n]z$qw>?2Y^$>M:PZ1eMHj*ucI)rnYi1jKld3):n/|1(5"
Note that you can automatically generate YAML-formatted encryption keys using the Roots salt generator.
Encrypt sensitive data with Ansible Vault.
Since it’s always a bad idea to commit plain text credentials in a repo, we’re going to use Ansible’s built-in encryption to keep passwords and other sensitive data safe.
To do this, we create a password that will only be stored on our computer, which Ansible can use to decrypt the files. Trellis is already configured to ignore the password, so someone would need physical access to our computer to get the credentials.
Create a password for encrypting and decrypting files.
First, create a new file at trellis/.vault_pass:
# Make sure we’re in the `trellis/` directory
pwd
# Output => /Users/jlengstorf/dev/code.lengstorf.com/projects/learn-trellis/trellis

# Create a new file called `.vault_pass`
touch .vault_pass
Open trellis/.vault_pass for editing, then add a strong password:
Z+6Cm>TaofG=[379sED6Save and close this file.
Update the Ansible config to use the vault password.
Open trellis/ansible.cfg for editing and add the highlighted line:
  [defaults]
  callback_plugins = ~/.ansible/plugins/callback_plugins/:/usr/share/ansible_plugins/callback_plugins:lib/trellis/plugins/callback
  stdout_callback = output
  filter_plugins = ~/.ansible/plugins/filter_plugins/:/usr/share/ansible_plugins/filter_plugins:lib/trellis/plugins/filter
  force_color = True
  force_handlers = True
  inventory = hosts
  nocows = 1
  roles_path = vendor/roles
  vars_plugins = ~/.ansible/plugins/vars_plugins/:/usr/share/ansible_plugins/vars_plugins:lib/trellis/plugins/vars
+ vault_password_file = .vault_pass

  [ssh_connection]
  ssh_args = -o ForwardAgent=yes -o ControlMaster=auto -o ControlPersist=60s
This tells Ansible where to look for the vault password, rather than prompting for it.
Use ansible-vault to encrypt the files.
To actually encrypt the files, run the following command:
ansible-vault encrypt group_vars/production/vault.ymlThe output is a garbled mass of shit. This is a good thing — it means it’s encrypted. Here’s a snippet of what the encrypted file looks like:
$ANSIBLE_VAULT;1.1;AES256
62343434643862366430393366333661306366363937623561323637363033353366636134336230
3765633530336234393636306130346434333239636532650a336235356564303133303562626462
35363437383263653830313766646463646164303338626666366130396161383930373963613066
3366313862333134620a356563656432306335636331633063653163626638306532666335306239
...Part VI: Provision the Production Server
Now that the proper configuration is in place, we need to let Trellis provision — or configure — the production server. Before we can do that, we need to update a few more configuration options, then make sure our source code is in a public repo and our domain name points to the production server.
Set up DNS so Let’s Encrypt can run properly.
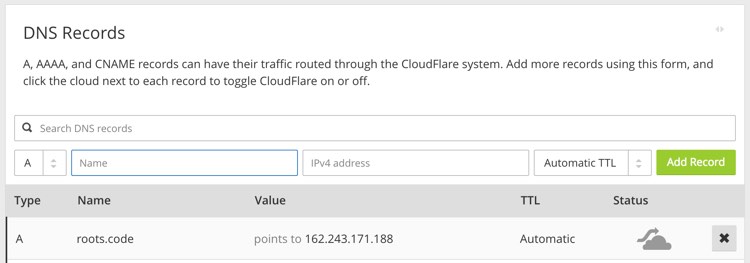
Since Let’s Encrypt needs to verify the domain name in order to create an SSL certificate, we need to make sure the domain name points to the server before we try to provision it. Otherwise, we’ll get an error during the SSL step.
In your DNS manager of choice (typically the site you bought the domain name through, e.g. Namecheap or GoDaddy), update the A record for your domain to point to your DigitalOcean droplet’s IP address.
Use your GitHub keys for deployment.
To make sure cloning the repo on the production server goes smoothly, Ansible needs to know about your GitHub account’s public keys.
Open trellis/group_vars/all/users.yml for editing, uncomment the GitHub URLs, and edit them to reflect your GitHub username:
# Documentation: https://roots.io/trellis/docs/ssh-keys/
admin_user: admin

  # Also define 'vault_users' (`group_vars/staging/vault.yml`, `group_vars/production/vault.yml`)
  users:
    - name: "{{ web_user }}"
      groups:
        - "{{ web_group }}"
      keys:
        - "{{ lookup('file', '~/.ssh/id_rsa.pub') }}"
+       # IMPORTANT: Add YOUR GitHub username here.
+       - https://github.com/jlengstorf.keys
    - name: "{{ admin_user }}"
      groups:
        - sudo
      keys:
        - "{{ lookup('file', '~/.ssh/id_rsa.pub') }}"
+       # IMPORTANT: Add YOUR GitHub username here.
+       - https://github.com/jlengstorf.keys

  web_user: web
  web_group: www-data
  web_sudoers:
    - "/usr/sbin/service php7.0-fpm *"
Disable root login for better security.
This step is optional, but unless you have a really good reason to keep the root user enabled, it’s a good idea to disable it. The root user can wreak havoc on a server, so we can sleep better knowing that it’s disabled and can’t hurt anyone anymore.
Open trellis/group_vars/all/security.yml for editing and change the highlighted line:
  ferm_input_list:
    - type: dport_accept
      dport: [http, https]
      filename: nginx_accept
    - type: dport_accept
      dport: [ssh]
      saddr: "{{ ip_whitelist }}"
    - type: dport_limit
      dport: [ssh]
      seconds: 300
      hits: 20

  # Documentation: https://roots.io/trellis/docs/security/
  # If sshd_permit_root_login: false, admin_user must be in 'users' (`group_vars/all/users.yml`) with sudo group
  # and in 'vault_users' (`group_vars/staging/vault.yml`, `group_vars/production/vault.yml`)
+ sshd_permit_root_login: false
  sshd_password_authentication: false
Commit the site’s code to GitHub.
For this tutorial, I created a repo called roots.code.lengstorf.com. You’ll want to create your own for this step.
To get our site’s code up to that repo, run the following commands:
# Move to the project root
cd ..
pwd
# Output => /Users/jlengstorf/dev/code.lengstorf.com/projects/learn-trellis

# Initialize a Git repository.
git init

# Add all the files to the repo.
git add -A

# Commit the files.
git commit -m 'Initial commit.'

# Add the GitHub repo as a remote repository.
# IMPORTANT: Replace this with YOUR GitHub repository!
git remote add origin git@github.com:jlengstorf/roots.code.lengstorf.com.git

# Push the `master` branch to GitHub and set it up for tracking.
git push --set-upstream origin master
Run the server provisioning script.
With the repo ready, the DNS configured, and some security measures in place, we’re ready to provision the server.
Provisioning means getting the server ready: Ansible will run through a series of commands that download, install, and configure our server based on the information we’ve provided in the configuration files.
To make it happen, all we need to do is run the following:
# Move into the Trellis directory.
cd trellis/

# Provision the server using the `production` configuration options.
ansible-playbook server.yml -e env=production
This takes about 5–10 minutes. The output in the command line walks through everything that’s being installed and configured, so if you’re curious you can follow along and see what the Roots maintainers consider best practices for server configuration.
Or, we can walk away and let the robots do our bidding.
When it’s all done, we’ll see a “play recap” from Ansible that looks something like this:
PLAY RECAP **\*\***\*\*\*\***\*\***\*\***\*\***\*\*\*\***\*\***\***\*\***\*\*\*\***\*\***\*\***\*\***\*\*\*\***\*\***
162.243.171.188 : ok=130 changed=93 unreachable=0 failed=0
localhost : ok=0 changed=0 unreachable=0 failed=0
With 0 failures, we’re ready to deploy!
Part VII: Deploy the Site to Production
Our last step — deploying our WordPress site to the DigitalOcean droplet — is really fucking easy — even compared to the rest of the steps in this walkthrough. We’ve already configured everything. We’ve already committed all our site’s files to GitHub. We’ve already provisioned a server.
Now we just need Ansible to copy the site files and fire it up.
Enter the following to make it happen:
# Make sure we're in the `trellis/` directory.
pwd
# Output => /Users/jlengstorf/dev/code.lengstorf.com/projects/learn-trellis/trellis

# Deploy the `roots.code.lengstorf.com` site using `production` options.
# NOTE: Replace this site key with YOUR site key.
./bin/deploy.sh production roots.code.lengstorf.com
This takes a minute or two, and ends with a “play recap”, just like provisioning. It should look something like this:
PLAY RECAP **\*\***\*\*\*\***\*\***\*\***\*\***\*\*\*\***\*\***\***\*\***\*\*\*\***\*\***\*\***\*\***\*\*\*\***\*\***
162.243.171.188 : ok=27 changed=12 unreachable=0 failed=0
localhost : ok=0 changed=0 unreachable=0 failed=0Check the Live Site
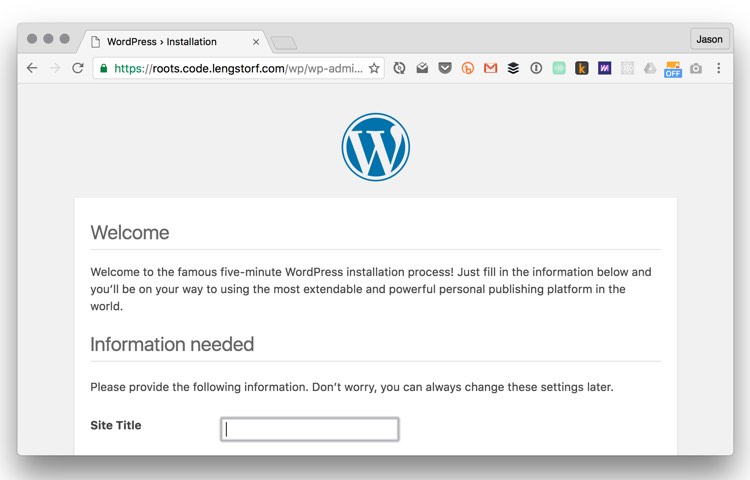
And that’s it. We’ve successfully deployed an SSL-secured (for free), painlessly-source-controlled WordPress site on a live domain name, all for about 20 minutes and $5/month.
BONUS: Synchronize Databases Using WP Sync DB
Trellis only manages files, so you’ll notice that the new site doesn’t match up with the development site. This isn’t a big deal when you first start out, but as the production site starts to grow and the content builds up, it’s a pain in the ass to pull a copy of the database so you can develop using real data.
Fortunately, the free plugin WP Sync DB makes synchronizing databases really painless. So let’s install that and try it out.
Install WP Sync DB on the site.
Since we’re using Bedrock, installing the plugin is as simple as telling Composer we want to use it.
# Make sure we’re in the site/ directory.
cd ../site
pwd
# Output => /Users/dev/code.lengstorf.com/projects/learn-trellis/site

# Use Composer to install WP Sync DB
composer require wp-sync-db/wp-sync-db:dev-master@dev

# Use Composer to install the media attachments plugin for WP Sync DB
composer require wp-sync-db/wp-sync-db-media-files:dev-masterCommit and redeploy to production.
After WP Sync DB is installed, we need to get it installed on the production server. This is a good example of how easy it is to deploy changes using Trellis: if you run git status, you’ll see that composer.json and composer.lock have been updated; simply commit and push those files, then redeploy to production.
# Commit the changes and push them.
git commit -Am 'feat(wp-sync-db): installed WP Sync DB'
git push

# Deploy the changes to production.
cd ../trellis
./bin/deploy.sh production roots.code.lengstorf.com
Activate WP Sync DB on the production site and get the API key.
Once the deploy is complete, go to the production site’s WordPress dashboard (e.g. https://roots.code.lengstorf.com/wp/wp-admin/), log in, then click “Plugins” in the left-hand menu.
Activate both the “WP Sync DB” and “WP Sync DB Media Files” plugins, then navigate to “Tools”, then “Migrate DB” in the left-hand menu.
Click the “Settings” tab, then do the following:
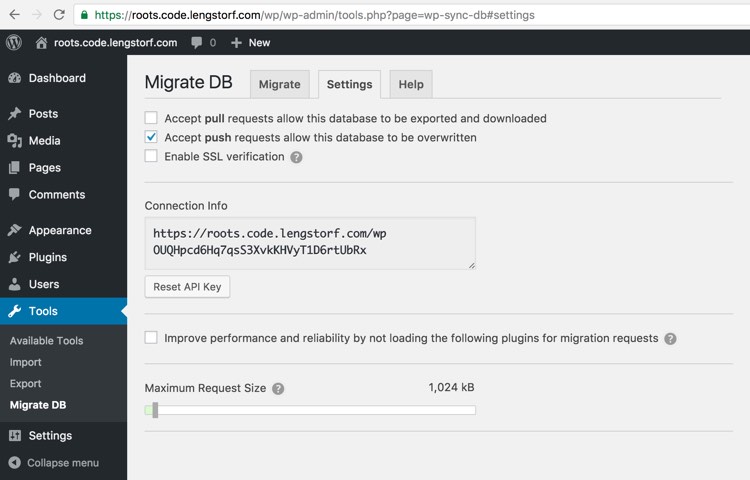
- Check the “Accept push requests…” option.
- Copy the link in the “Connection Info” box.
Now the plugin is able to receive a database update from an external site (our development site, in this example).
Activate WP Sync DB on the development site and configure the sync.
On your development site, head to the “Plugins” page on your WordPress dashboard to activate the WP Sync DB and WP Sync DB Media Files plugins, then navigate to Tools > Migrate DB.
On the “Migrate” tab, update the settings as shown:
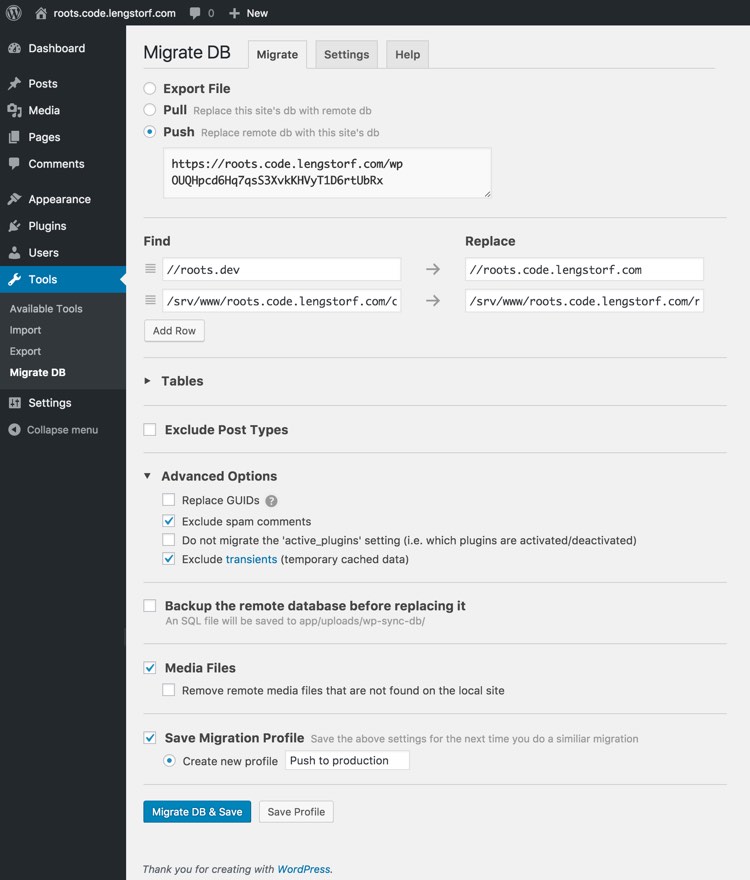
- Choose the “Push” option.
- Paste the production site’s connection info into the text area that appears (what we copied in the previous step).
- Under Advanced options:
- Uncheck the “Replace GUIDs” option.
- Check the “exclude spam comments” option.
- [OPTIONAL] Check the “Backup the remote database before replacing it” option. This is probably a good idea if the production site has real data on it.
- Check the “Media Files” option.
- [OPTIONAL] Check the “Save Migration Profile” option and create a name so you can quickly push changes to production.
Once all these settings have been updated, click the “Migrate DB & Save” button.


Once this is done, you can reload the production site and see that the database from the development site is now live on production.